There are several ways to clean and shape rough opal but I am going to explain the method I use. This method can be applied to many types of precious and semi precious stones, not only opal.
I grind and shape my opal wet. I do this for 2 reasons, firstly it helps me see the colour in the stone especially if I am chasing a colour bar and secondly it reduces the risk of cracking the stone through overheating. Even though I am grinding and shaping wet I still recommend wearing a dust mask and protective eye wear.
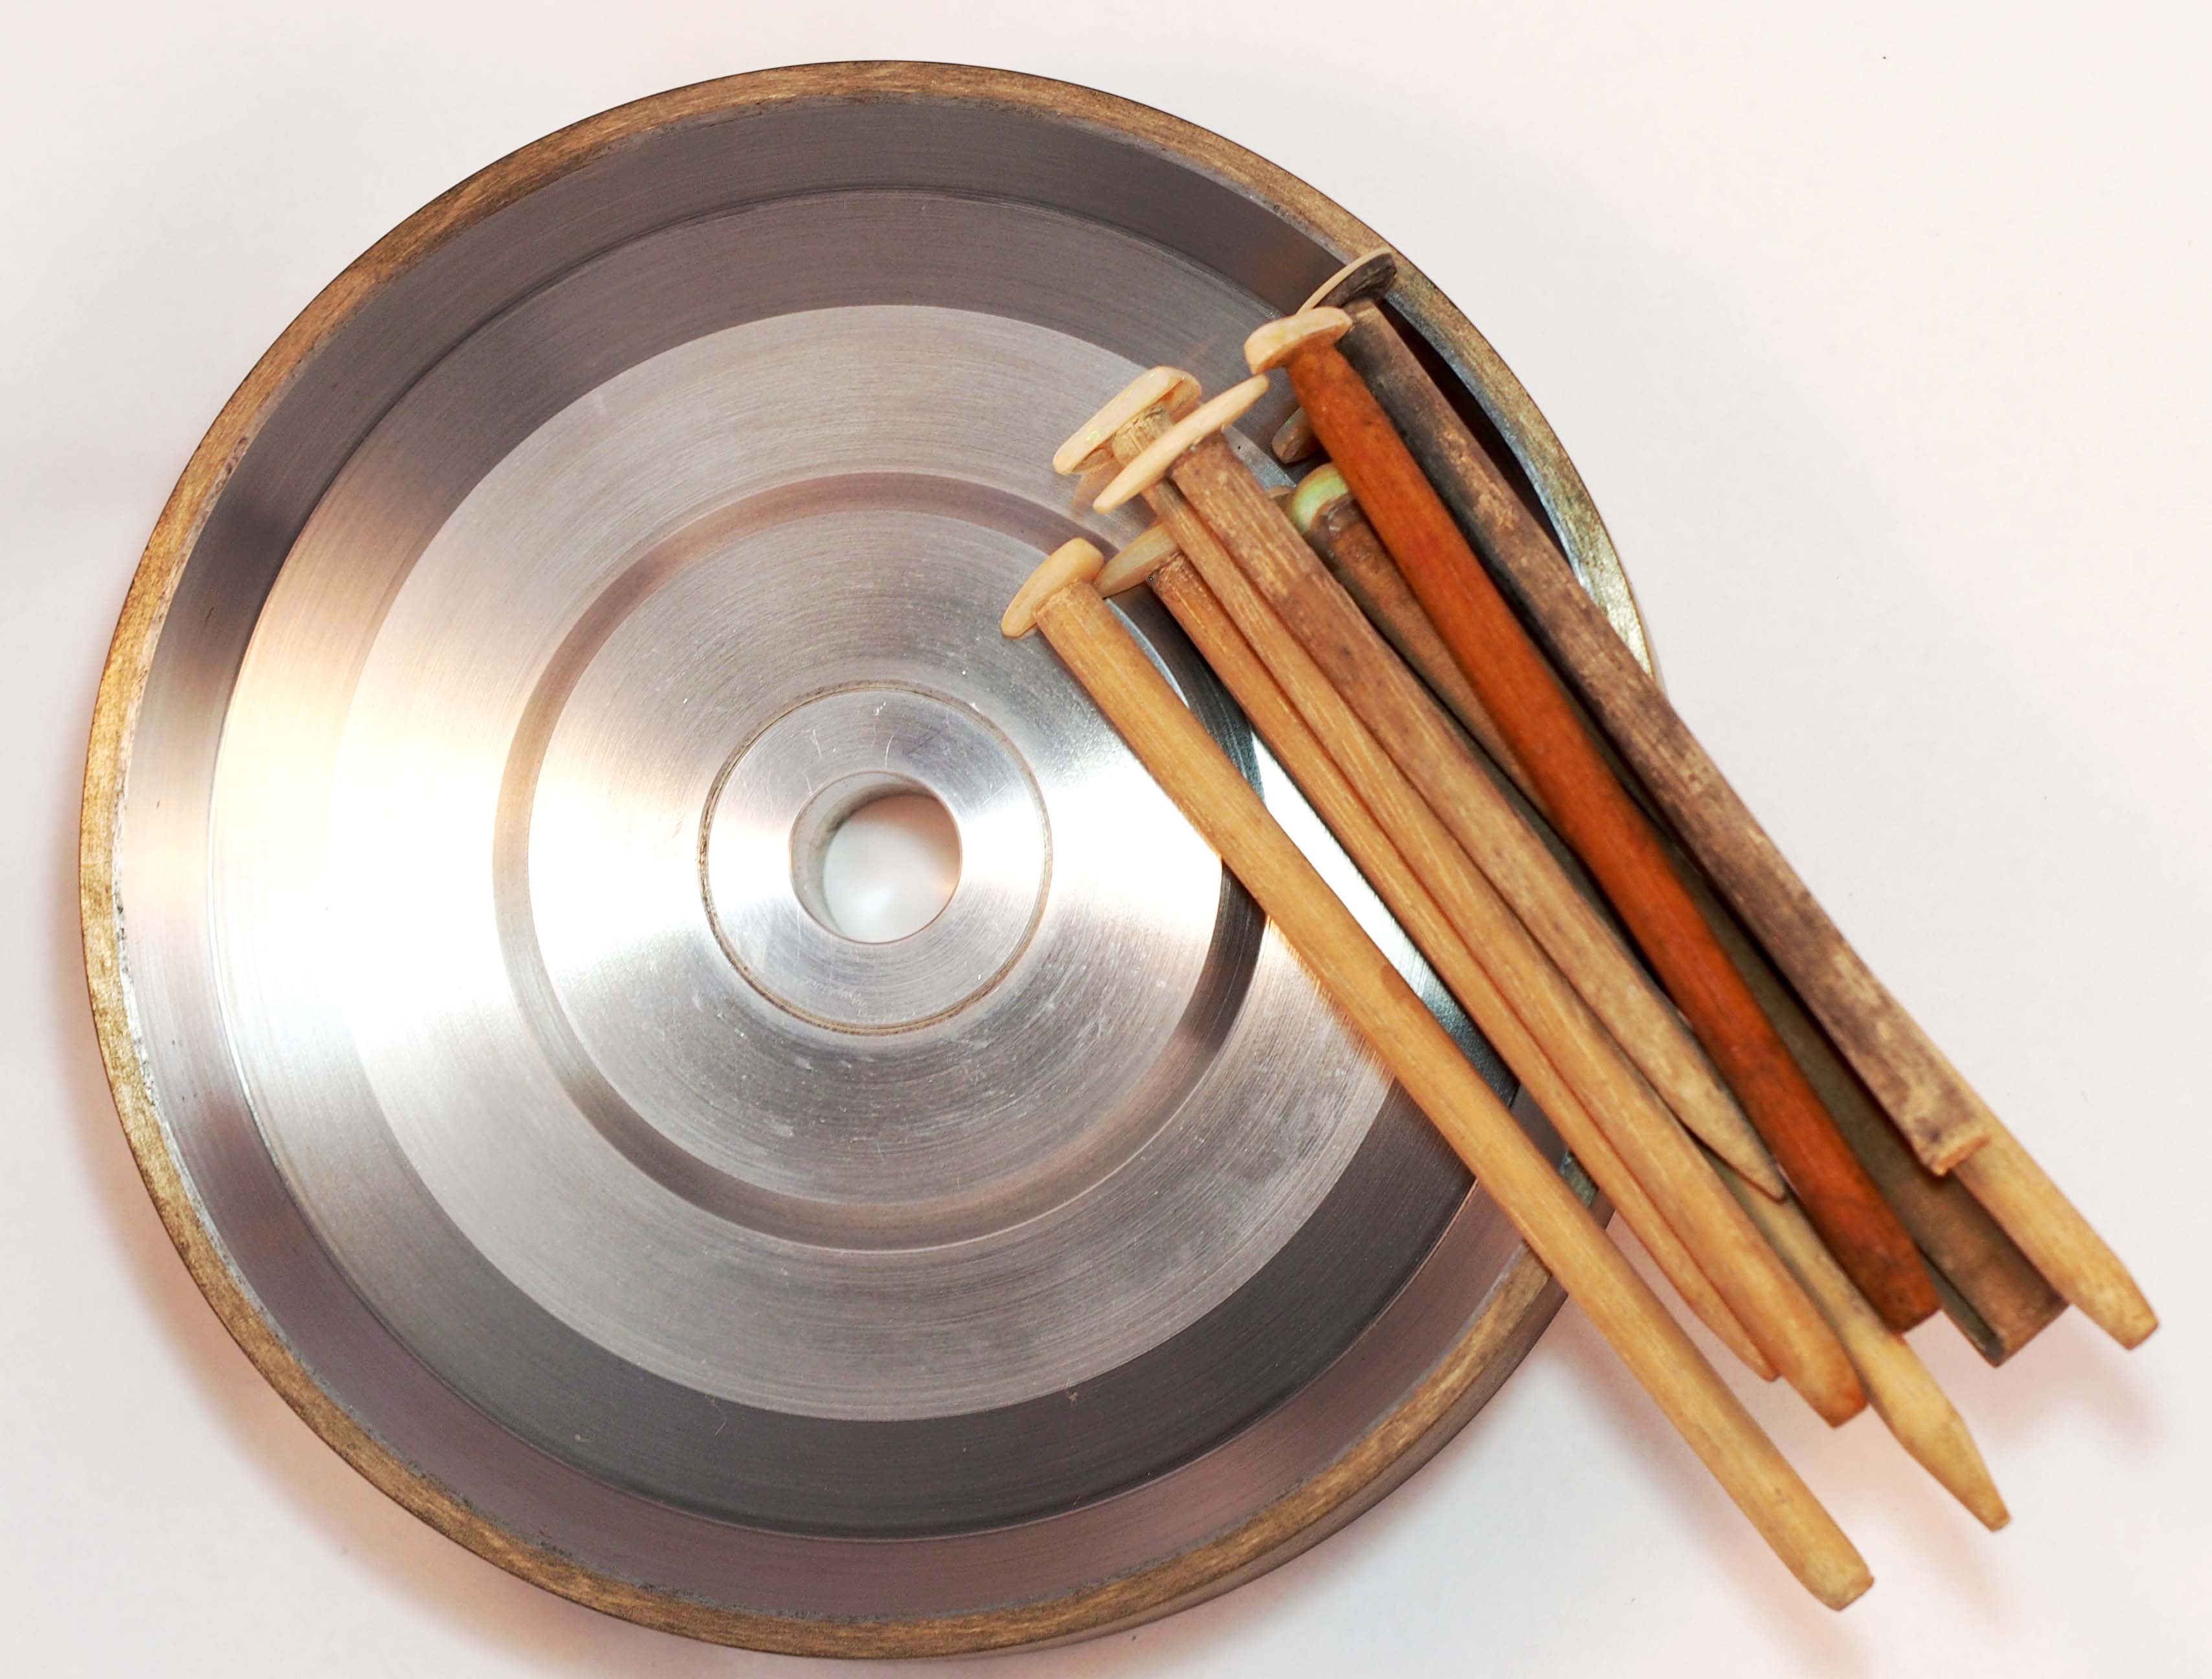
I do the majority of grinding and shaping on the side of a wheel rather than the front or periphery of the wheel. It is possible to use silicon carbide wet and dry paper or a silicon carbide grinding wheel, but I use a diamond wheel. It is a 6A2, 6”x #240 grit metal bond (also known as sintered), cup wheel but you can also use an electroplated diamond wheel, depending on your budget.
I find it easier to shape on a flat surface rather than a curved surface. When I first started working with opal I became discouraged because I found it difficult to get a curved surface (a cabochon) on an opal using a curved wheel (front or periphery of wheel). With the wheel running vertical l have a clear view of the stone I am working on.
My machine is a Gemmasta GMP8 No 1. I like this machine because it is simple in design, easy to maintain and it gives me clear access to the wheel. My machine is over 30 years old and it just keeps going. It is easy to change wheels as necessary. From the factory, this machine has 3 speeds. I always use the fastest speed. Whatever your machine may be, use the fastest speed, this way the stone won’t drag as much. As always with any opal processing use adequate lighting and a head visor if necessary. I use a 100 watt incandescent light globe in a desk lamp and an Optivisor head magnifier.
Before grinding or shaping I should say something about orientation of the opal. Sometimes when the opal is in its rough state it is obvious which part will be the top of the stone. Other times you may need to gently grind some of the surface of the opal to decide which side is best. When looking at the stone wet, in adequate light, the surface that shows the best colour and pattern should be the top of the stone. Take your time, especially if it is a good piece. Sometimes I will take days to decide which way I should grind and sand a special piece. Once it is cut there is no going back.
When you are starting out it may be of help to use a template to mark out the shape of the stone you wish to grind. With time this step will no longer be necessary and you will be able to grind and shape by eye. Once you have trimmed the stone by diamond saw if necessary, and dopped it, proceed to your grinder for the shaping stage.
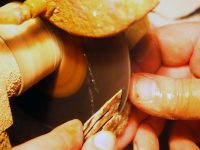
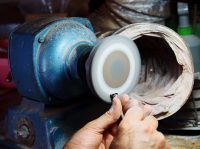
If my intention is to cut a round or oval stone I try to make the cabochon as large as possible while keeping the proportions. You don’t want a large stone that is too thin and you don’t want a small stone that is too thick. With the machine running and adequate water running on the wheel, bring the dopped stone into contact with the wheel. Apply gentle pressure until you become familiar with the coarseness of your wheel or its cutting speed. The purpose of the dop stick is to allow you to turn the stone without interference from your fingers. Take your time to pre form your stone. When I say pre form I am referring to the shape you are trying to achieve, round, oval etc. Turn the dopped stone against the wheel stopping to see if it has symmetry. I achieve best results by turning the dop stick in the opposite direction that the wheel is turning. In other words the grinding surface and the opal are turning in opposite directions. Once you are happy with the pre formed shape, it is time to give the pre form its cabochon. During the pre forming process, you should have been holding the dop stick parallel to the wheel. During the cabochon process, you will swing the dop stick in an arc of 90 degrees while turning the dop stick in a circular motion. Try not to make the cabochon too high. I tend to make a flat top cabochon. There will need to be a setting edge or girdle line around the stone. So don’t start your arc from the pre form position, allow a few degrees of no grinding at the start of your arc. I know it sounds difficult but with time, you will master this process. When you have finished the cabochon you may have a spiral pattern on it. That’s ok because it will come out in the sanding process. At this stage I normally go to my sander, then polisher. After which I remove the stone from the dop stick, re dop the stone onto the polished surface, grind and sand the back of the stone flat and give it a seating edge of 45 degrees. Remove the stone from the dop stick. Clean it and check it. Your grinding and shaping process should now be complete.
If you have any questions, I will do my best to answer them.